One question I get all the time is: “Can I move teeth using CAD software?”
The short answer is “absolutely!” In reality, moving objects around with CAD software is quite simple to do. It all starts with using Meshmixer software. Think of an STL file as a 3-dimensional photograph and Meshmixer as your photo editing software. Just like in Adobe Photoshop® software, you can build layers and layers together to form a single photograph… you can do the same in Meshmixer.
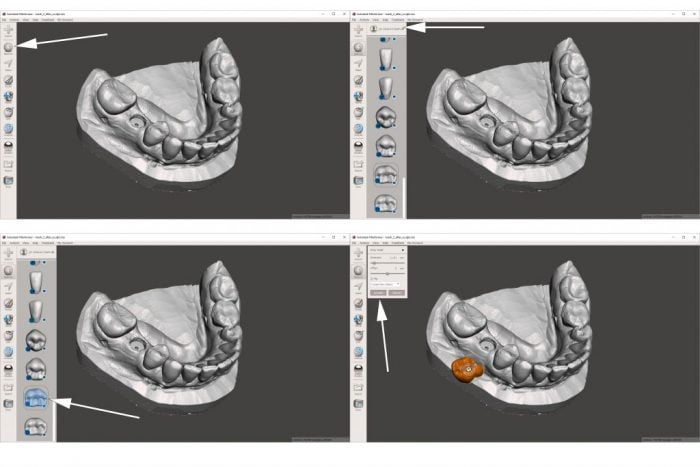
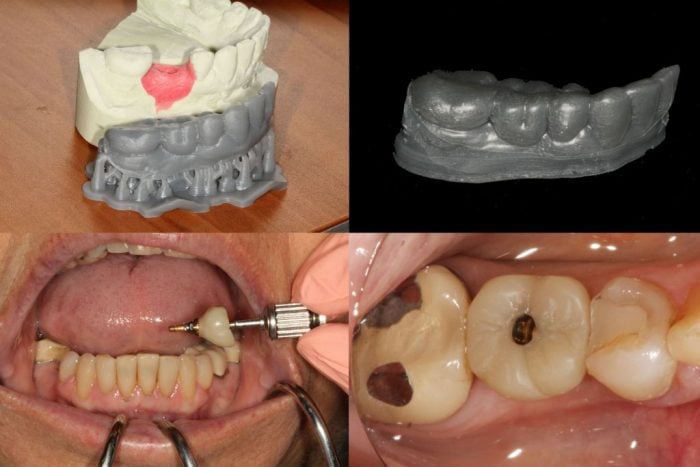
Let’s start with a simple model of a patient with an implant at mandibular first molar position (#30) and I want to go ahead and generate a model of the patient to fabricate a vacuum matrix to make a temporary or maybe for an Essix-style retainer while implant integrates. The first thing you need to do is bring in the model by importing the STL file. Then go ahead and add a wax-up tooth, which I have built into my meshmixer software as a tooth library that I created. I click on “Dr. Scherer’s Virtual Tooth Library” and then navigate to tooth #30 and drag it onto the model.
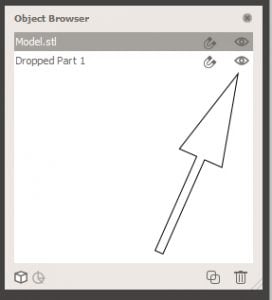
Once I add the tooth onto the virtual model, it automatically opens the “objects browser” which is essentially like the layers box in Photoshop. In this browser, I can toggle on and off each one of the layers by clicking on the eye icon next to the little icon that looks like a magnet. This is an incredibly powerful feature for this free software to be able to do!
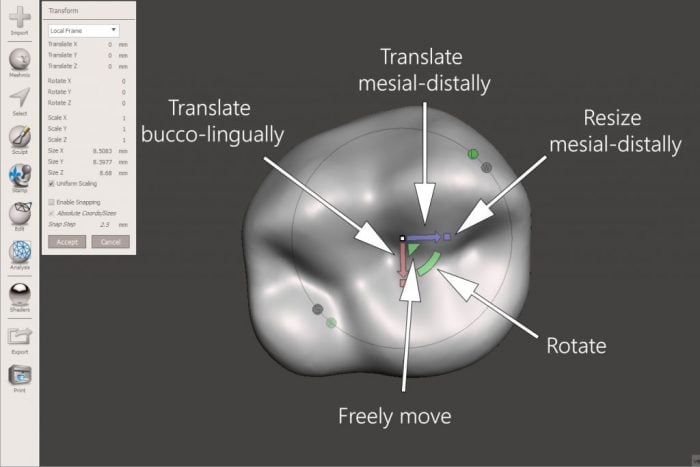
Once the tooth has been placed, you can click on the tooth and then hit “T” on your keyboard to open the transform function of the software, which looks like a few yellow, red and purple lines on the tooth. The triangles allow you to easily move the tooth and the arrows move the tooth in a direction you want it to. Watch out for the small rectangles on the ends of the arrows, they resize the tooth, which is good if you want it to resize the wax-up tooth, but not the patient model you are working on!!
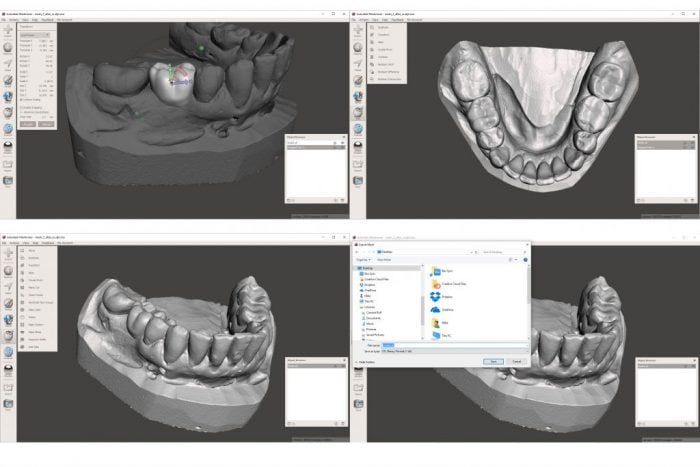
Once you have moved the tooth into the proper position, you can play with the resize and rotate tools to confirm everything is done properly. Now you have successfully “waxed-up” your patient’s model with a mandibular first molar! It’s important to now combine the two layers into one. Click on each layer in your objects browser and then a pop-up box will have the “combine” button on it, click that and you now have one virtual model. You can now export the combined model and save it to your desktop as an STL.
Once you have it saved to your desktop, you can print the model it on your 3D printer and do your normal laboratory tasks. In this case example, I had a stone model with the analog in place, I modified a temporary coping to fit under the vacuum matrix I created from the virtual model to create a nice fixed temporary for this patient while we were waiting for the lab to make her final crowns!
